

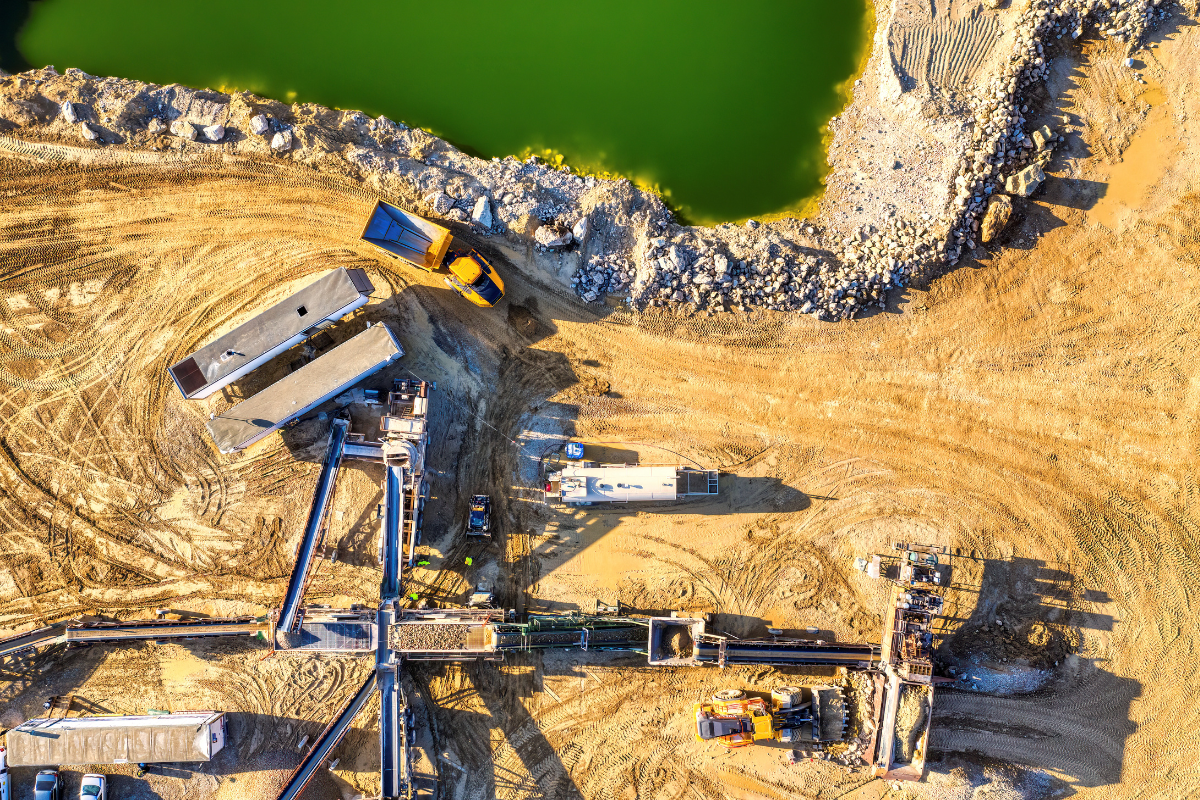
Every commercial structure begins long before concrete is poured or steel is raised. Its real starting point is the ground itself, and whether that ground can safely support the project for decades. Site preparation brings order to raw land by identifying risks, shaping the terrain, controlling water, and creating stable conditions for construction. When handled carefully, it protects schedules, budgets, workers, and the building’s long-term performance. When overlooked, hidden soil, drainage, or access problems can quickly become expensive setbacks.
This blog explains what site preparation involves, why it matters, and how commercial teams can approach each stage with greater confidence.
What Is Site Preparation in Commercial Construction?
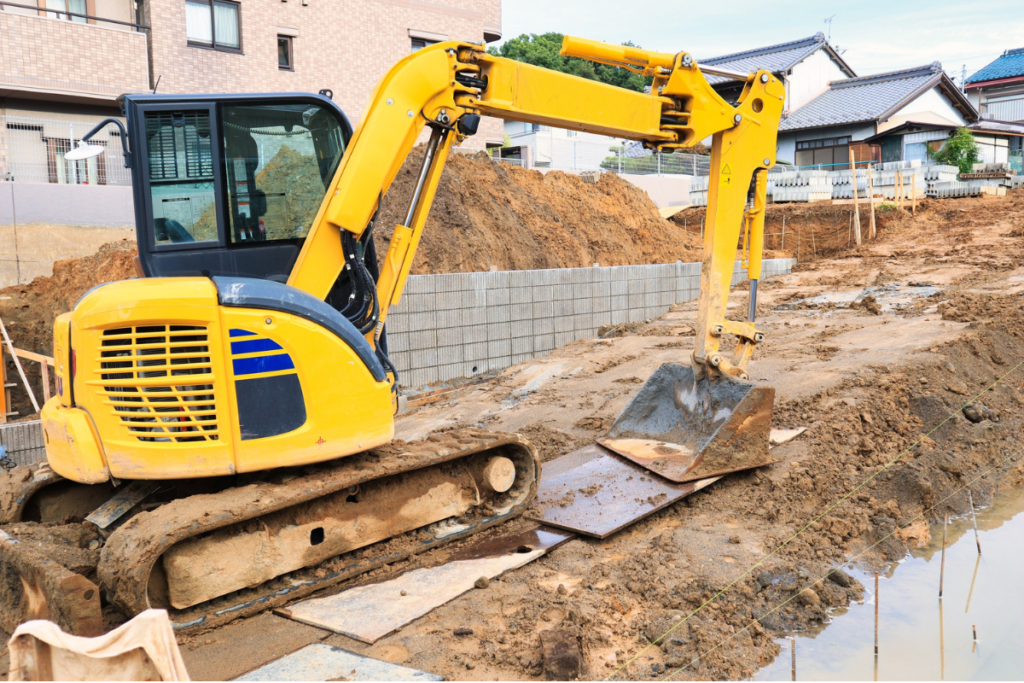
Site preparation is the series of steps taken to make a land ready for construction.
In essence, it means transforming raw land into a stable, cleared, and graded surface that can safely support new structures. Depending on the condition of the property and the scope of construction, the process of site preparation may involve:
- Evaluating soil and site conditions
- Surveying boundaries
- Clearing vegetation and debris
- Demolishing old structures (if any)
- Excavating and moving earth
- Installing drainage and erosion controls
- Compacting the ground to engineering specifications
Some activities begin during preconstruction, while physical land disturbance generally begins after the required plans and permits have been approved.
Proper site preparation lays the foundation for the entire commercial building project. If done correctly, it ensures that foundations are built on solid ground, that water drains safely away, and that the site is safe and accessible for construction crews.
Without preparing the site, even the best-designed building can suffer from instability, water intrusion, or safety problems later on.
Why Proper Site Preparation Is Important
Skimping on commercial site preparation is a false economy. When the ground isn’t readied properly, a cascade of problems can follow.
The key benefits of proper site preparation are:
- Stabilizes the Ground: Compact, well-graded soil and rock prevent uneven settling. For example, unstable or improperly graded soil may shift, settle, or erode, leading to cracked foundations, sticking doors, or uneven floors as soon as a few years after construction.
- Protects the Foundation: Statistically, pre-construction issues are the leading causes of foundation failures. One analysis found that 62.5% of foundation failure causes originate in the pre-construction phase, the very period when site preparation occurs. This underscores how vital thorough site evaluation and preparation are to the long-term stability of any commercial structure.
- Reduces Repair Costs: Careful site preparation can prevent thousands of dollars in later fixes. For example, foundation repairs in San Francisco may cost between $4,400–$15,800, while major structural work such as underpinning, pier installation, or foundation lifting can cost $25,000–$80,000 or more. These kinds of costs usually stem from rushing or skipping early groundwork.
- Manages Water Effectively: Correct slopes and drainage systems keep water away from the building. Likewise, poor drainage planning can allow water to pool against a building, damaging basements or causing mold growth. In fact, the U.S. Environmental Protection Agency notes that improper site drainage can cause rain and snowmelt to damage foundations and other structures.
- Improves Site Safety: Clear, level work areas reduce the risk of accidents for crews and create safer access for workers, vehicles, and heavy equipment. Early soil assessment, underground utility checks, and excavation planning help reduce excavation and related hazards.
- Ensures Regulatory Compliance: Proper site preparation helps meet building and environmental codes. Addressing compliance requirements before construction begins makes inspections smoother and reduces the risk of stop-work orders, permit complications, fines, or costly rework.
- Improves Construction Efficiency: A well-prepared site not only protects the building but allows construction to start smoothly with minimal schedule delays or budget overruns. A Construction Industry Institute study found that construction-ready sites improved cost performance by 20%, schedule performance by 22%, and productivity by 29%, while reducing rework and field changes.
A construction site is only as solid as the ground beneath it. By investing time and effort in site prep, builders set up every project for success.
Main Steps in the Site Preparation Process
Site preparation is not a single task but a multi-step process. The exact steps can vary by project size, location, and scope, but most projects involve the following core stages. Each step builds on the previous ones, and together they create a safe, level, and compliant building platform.
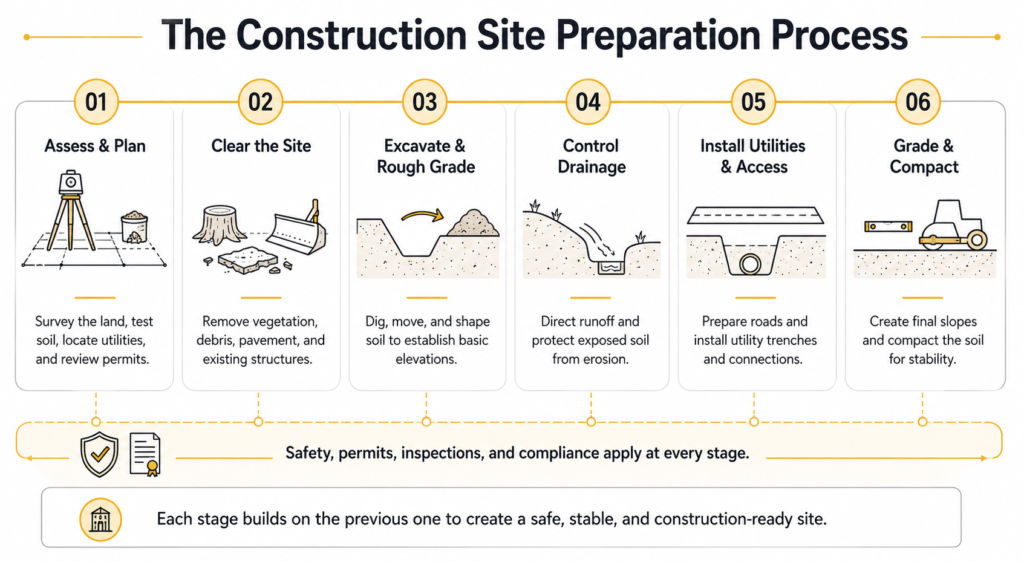
Site Assessment and Planning
Before any equipment moves or dirt is dug, engineers and planners study the site in detail. This involves:
- Land Survey: A professional surveyor maps property boundaries, identifies existing features (old structures, fences, wells, etc.), and marks the exact footprint for the new construction. This prevents encroaching on neighbors or violating setback rules.
- Soil Testing: Geotechnical engineers take soil samples (through boring or pits) to test bearing capacity, composition, and moisture. These tests reveal if soils are sandy, clayey, organic, or rock – and whether they can support the planned building loads. For example, the Unified Soil Classification System (USCS) and OSHA soil classes (Stable Rock, Type A, B, C) categorize soils by stability. A type A clay is far more stable than a type C sand.
- Environmental and Regulatory Review: The team checks zoning laws, permits needed (e.g. erosion control permits), and environmental regulations (such as wetlands or protected habitats). Identifying these upfront avoids legal surprises later.
- Utilities and Easements: Plans note the location of water, sewer, electric, gas, and telecom lines, as well as any easements or rights-of-way. Locating existing utilities (for example by “calling 811 before you dig”) prevents accidentally breaking a buried line during excavation.
Based on this assessment, the site’s limitations and needs become clear. Perhaps the soil is expansive clay requiring special compaction, or a section of the site is a wetland that must be fenced off. The evaluation guides decisions like what foundation type to use, where to set drains, and what equipment the general contractor will need. In short, a thorough site assessment lays the groundwork for a safe, efficient site-preparation plan.
Clearing and Demolition
Once the plan is set, the next phase is to clear the land of obstacles. This typically involves:
- Vegetation Removal: Trees, shrubs, stumps, brush, and root masses are cleared using bulldozers, excavators, or specialized mulching equipment. Even small plants and grass are often stripped or killed by herbicide.
- Debris and Trash Removal: Any debris, whether old fencing, trash piles, or brush, is hauled off-site or disposed of.
- Demolition of Structures: If there are existing buildings, sheds, or foundations on the site, these must be carefully demolished and removed. This includes breaking up old concrete pads or foundations and trucking the rubble away. Heavy machinery like wrecking balls, hydraulic breakers, and backhoes is used.
- Disposal: Clearing often generates large volumes of material. Most of it (wood, brush, rubble) must be either recycled or transported to a landfill per local rules. Proper disposal is crucial for environmental compliance.
The goal of clearing is to create a clean, open area free of interference. For example, if a wooded lot is being prepared, forestry mulchers or bulldozers will grind or push down trees and brush, leaving a clear, bare surface. This step also prepares the area for the next phases. Neglecting proper clearing can hide hazards that might damage equipment or undermine foundations later.
Excavation and Rough Grading
With the land cleared, heavy equipment moves in to shape the earth. This begins with excavation:
- Cutting and Filling: Excavators and bulldozers dig out high spots (cuts) and redistribute the soil into low areas (fills) to roughly match the planned building footprint elevations. For example, a hill might be cut down to create a flat pad, or fill brought in to raise a low section. This “cut-and-fill” process balances earthwork on-site when possible.
- Stepped or Terraced Grading: On sloped sites, the ground may be terraced or benched. This ensures the building area is level and accessible while also directing water down slope.
- Trenches: Trenches are dug for things like foundations, footings, septic systems, or utility lines. Care is taken to shore or slope trench sides per OSHA safety rules (so soil doesn’t collapse).
Rough grading establishes the basic shape and elevation of the site. During this stage, temporary piles of soil (mounds) are common; these will later be compacted or removed. The general contractor will frequently check elevations with transit or GPS equipment to match the design plan. The heavy machinery used (bulldozers, excavators, backhoes) is the backbone of moving large amounts of earth.
Good rough grading ensures that the final finished grade can be accomplished with minimal rework. In fact, experts note that leaving the rough grade wrong (even by a few inches) can lead to major drainage issues or extra cost down the line.
Drainage and Erosion Control
Controlling water is a critical concern during site preparation. Before paving or building, the site must be designed to shed water safely:
- Surface Drainage: Grading should naturally direct surface water away from foundations and toward approved outlets (drains, swales, curb inlets). Most building codes (e.g. IBC Section 1804.4) require the ground to slope away from the building, typically at least 6 inches down in the first 10 feet, that is a minimum 5% slope if obstructions prevent the full drop. Meeting these requirements avoids water pooling around the structure.
- Erosion Control: While construction is underway, bare soil is at risk of washing away. Contractors install temporary measures: silt fences along the perimeter to catch sediment, straw wattles or fiber rolls on slopes to slow runoff, and check dams in ditches. These Best Management Practices (BMPs) comply with stormwater regulations and protect neighboring areas from silt.
- Permanent Drainage Structures: If the project requires, crews may build retention/detention ponds, french drains, or outlet swales. For example, a retention basin might be excavated now, then landscaped later, to handle site runoff. Subsurface drains (like perforated pipes in gravel trenches) may also be laid to lower groundwater levels under foundations.
- Temporary Diversions: It is common to reroute streams or natural drainage off-site or away from construction zones to keep the work area dry.
Proper drainage planning during site prep not only meets codes (like the IBC requirements above) but also prevents later headaches such as basement flooding or soil erosion. For instance, the U.S. Environmental Protection Agency (EPA) advises that failing to divert stormwater will inevitably cause damage to a building’s foundation over time.
By the end of grading, the site should have no low spots that pool water, and all runoff should flow into pipes, ditches or collection areas as designed.
Utilities and Access
Even before the final grading is done, provisions are made for future utilities and access:
- Access Roads: The commercial contractor will lay out access ramps and roads so that heavy vehicles and equipment can reach the work area safely. These may be temporary gravel drives or reinforced areas to prevent trucks from bogging down.
- Utility Stub-Outs: Trenches are dug for utility connections (water, sewer, gas, electric, telecommunications), and conduits are installed. Often the main lines are extended to the site edge. Utilities not only support construction but must align with the final building plan.
- Site Survey Control: In some cases, survey markers or nails are permanently set now. This ensures that all future buildings like the foundations, columns, and walls can be accurately placed relative to the site coordinates.
Coordinating utilities at this stage saves time later. For large sites, installing underground lines often happens concurrent with grading so that they can be backfilled and covered before paving or foundation work.
Final Grading and Soil Compaction
The last major step of site preparation is fine grading and compaction:
- Fine (Finish) Grading: Heavy machinery like motor graders and small bulldozers are used to bring the site to its final elevations and slopes. This creates the smooth, finished surface on which foundations, slabs, and pavement will sit. The final grade will match the precise contours and elevations in the construction plans (down to a few tenths of a foot).
- Building Pad Preparation: The area where the building footprint will be is carefully graded, with cut and fill balanced so the base of the foundation is at the proper elevation. Engineers ensure that soil underneath the building pad is well-compacted and free of organic material.
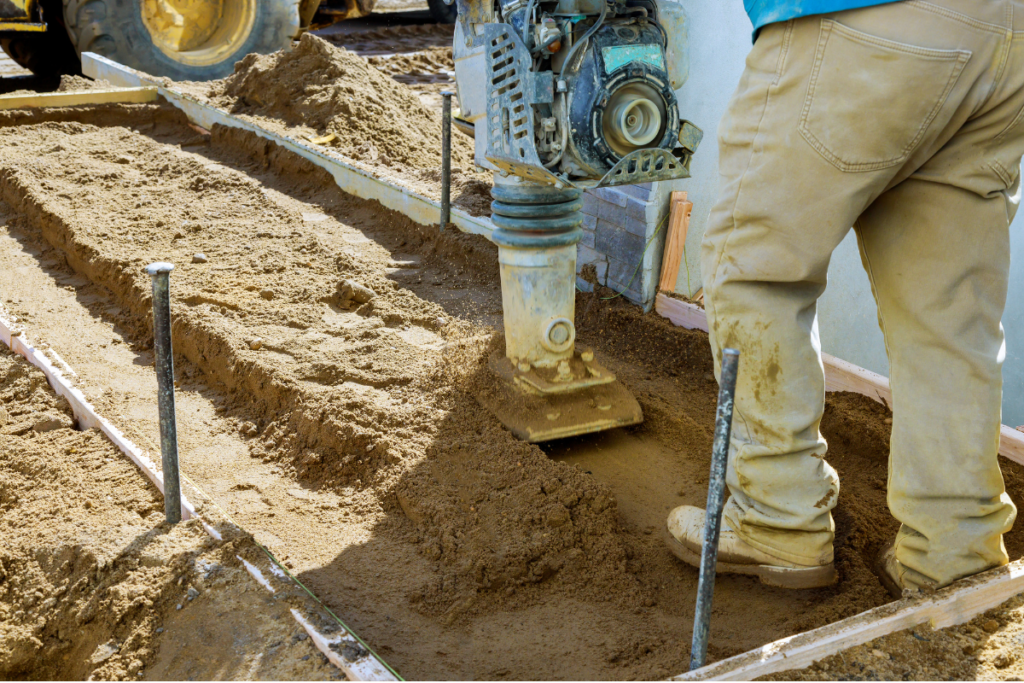
- Soil Compaction: After grading, the exposed soil is compacted in layers (lifts) using rollers or plate compactors. Compaction increases soil density and load-bearing capacity. It is one of the most critical steps, as loose soil will settle under weight. Each lift (often 6–12 inches thick) is compacted to a specified degree (often 90- 95% modified Proctor density) using equipment appropriate for the soil type (vibratory rollers for granular soils, kneading rollers for clays, etc.). Moisture levels are monitored and adjusted: slightly damp soil compacts better, while too wet or too dry can prevent proper compaction.
- Proof Rolling and Testing: Soil compaction is usually verified by inspectors. They might use a nuclear density gauge or perform sand cone tests to confirm that the required compaction is met. Any soft spots are reworked and re-tested.
Finished grading ensures the entire site has the proper elevations and slopes for drainage. At this point, the surface is stable and ready for foundation work, paving, and landscaping. Well-compacted soil minimizes future settlement, while precise grading ensures water will behave as intended.
Site Safety and Permits
Throughout site preparation, safety and compliance are paramount:
- Permits and Inspections: Before heavy work starts, required permits (building, grading, erosion control) should be obtained. Jurisdictions often require inspection of things like compaction, drainage systems, and site fencing.
- Safety Plan: A site-specific safety plan addresses hazards identified in the assessment. This includes emergency contacts, PPE requirements, and procedures to avoid cave-ins or equipment accidents. For example, OSHA requires a “competent person” to inspect trenches daily for stability and enforce protective measures in excavations.
- Fencing and Signage: Temporary fencing or barriers are installed to secure the site, prevent unauthorized access, and protect pedestrians. Warning signs and traffic barriers may be placed if heavy equipment is crossing public roads.
- Worker Training: Anyone operating machinery or working on site must be trained and certified as needed (e.g. crane operators, flaggers, forklift drivers).
Careful attention to safety during site prep not only meets legal obligations, but also keeps the project moving. An accident during grading or excavation can delay the entire schedule. By the time site preparation is done, the site should be well-marked, inspected, and ready for the contractor to begin without delay.
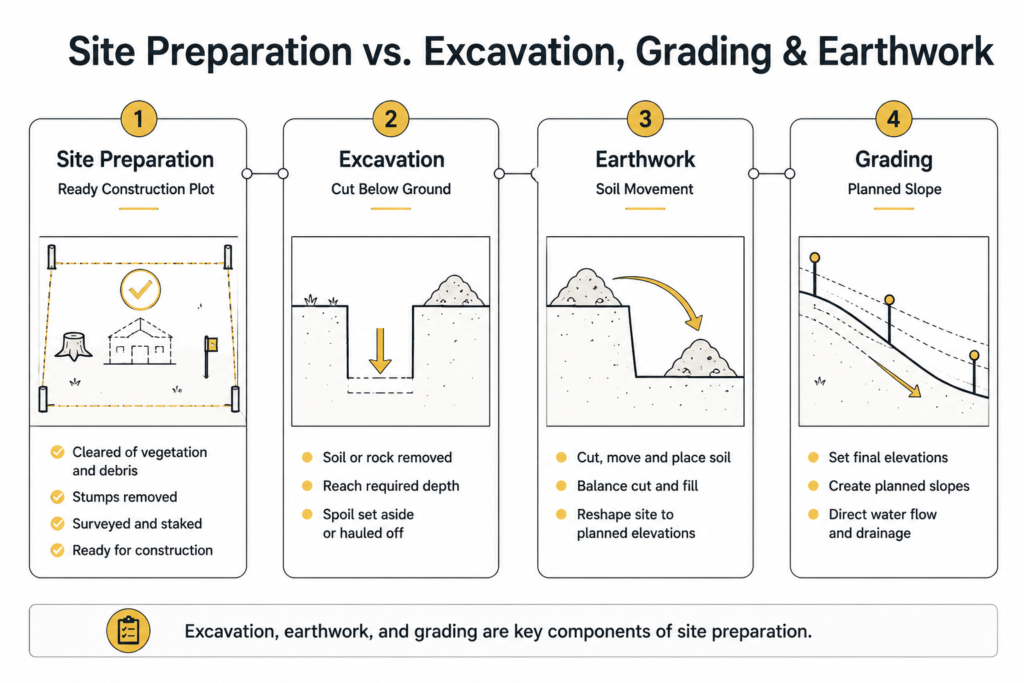
Site Preparation vs. Excavation, Grading, and Earthwork
These terms are closely related, but each describes a different part of the construction process. Understanding the distinction helps clarify the scope of work and the role of each activity.
| Activity | Main Purpose |
|---|---|
| Site Preparation | Prepares the entire property for construction. |
| Site Clearing | Removes vegetation, debris, pavement, structures, and other obstructions. |
| Excavation | Removes soil or rock to reach the required depth. |
| Earthwork | Moves, places, shapes, and manages soil across the site. |
| Grading | Creates the planned elevations, contours, and drainage slopes. |
| Leveling | Produces a smooth and relatively even surface. |
| Compaction | Densifies soil or fill to improve stability and reduce settlement. |
Earthwork, excavation, grading, and compaction are therefore components of construction site preparation rather than interchangeable terms.
Equipment Used in Site Preparation
Efficient site preparation relies on the right machinery. Construction teams commonly use:
- Excavators: For digging trenches, holes, and moving earth. They range from small (mini-excavators) to large hydraulic machines with buckets or specialty attachments.
- Bulldozers: Essential for pushing large volumes of soil, ripping up roots, and rough grading. Their heavy blades can clear vegetation and perform initial leveling.
- Motor Graders: Used for precision grading of the site surface. A skilled operator can finely cut or fill to achieve the design slope and smoothness.
- Backhoe Loaders: These versatile machines have a bucket in front and a narrow backhoe in back. They are used for smaller excavations or moving material.
- Wheel Loaders: Useful for hauling material around the site quickly, feeding soil into dump trucks, or stockpiling fill.
- Compactors/Rollers: To densify soil. Plate compactors are used in confined spaces (like trenches), and smooth drum rollers are used on open areas. Larger projects may use vibratory double-drum rollers or sheepsfoot rollers (especially for clay).
- Dump Trucks: For hauling soil, rock, and debris on and off the site. Many projects bring in truckloads of fill soil or haul away excess material.
- Skid Steer Loaders: Small, agile loaders for tasks like moving brush, gravel, or debris in tight spaces. Often fitted with buckets, forks, or brush cutters.
- Land Clearing Equipment: This may include tree chippers, stump grinders, or specialized mulchers for vegetation removal.
The choice of equipment depends on site access, soil type and condition, project size, excavation depth, and the amount of material being moved. For example, dense clay might require a sheepsfoot roller to adequately compact, while a sandy site is easily compacted by a vibratory roller. Safety features like backup alarms, roll-over protection, and regular maintenance on all machinery are also critical to prevent accidents during this dynamic phase.
Commercial Site Preparation Costs
Before setting a site preparation budget, each part of the work should be reviewed separately. A simple cost per acre rarely gives an accurate commercial estimate because soil conditions, terrain, drainage, utility access, vegetation and building loads can differ significantly from one property to another.
Typical planning costs for preparing a commercial site include:
- Clearing and Grubbing: May cost $5,000–$11,000 per acre, although dense vegetation, difficult access or strict erosion-control requirements may increase the price.
- Surveying and Site Planning: Combined costs generally range from $1,250–$4,500, depending on site size, terrain and civil-design complexity.
- Geotechnical Investigation: A standard investigation may cost $1,000–$5,000, with additional borings or laboratory analysis adding to the total.
- Grading and Leveling: Basic grading typically runs $0.40–$2.00 per square foot. Rock excavation, imported fill and off-site soil disposal are normally charged separately.
- Drainage and Erosion Control: Basic controls may cost $1,000–$5,000. Larger commercial projects may require engineered stormwater systems, detention areas or underground drainage.
- Utility Connections: May cost $10,000–$50,000 or more, especially when existing services are far from the building area.
- Demolition: Removing an existing commercial structure may cost $20,000 to over $100,000, depending on its size, construction materials, disposal requirements and site access.
Sample Site Preparation Budget
Consider an 18,000-square-foot (about 0.41-acre) commercial site planned for a small medical office building. The property has a gentle slope, scattered trees and an existing asphalt pavement of 5,000 square feet that must be removed. A small section of weak soil also needs to be excavated and replaced. Water and electricity are located near the property, while the sewer line must be about 150 feet from the proposed building area.
| Site Preparation Item | Estimated Cost |
|---|---|
| Survey and Site Planning | $1,500–$4,000 |
| Geotechnical Investigation | $1,000–$3,000 |
| Clearing and Grubbing | $2,000–$6,000 |
| Pavement Removal and Disposal | $4,000–$10,000 |
| Weak-Soil Removal and Replacement | $3,000–$9,000 |
| Rough Grading and Cut-and-Fill | $6,000–$18,000 |
| Aggregate Sub-Base and Compaction | $4,000–$10,000 |
| Drainage and Erosion Controls | $2,000–$6,000 |
| Utility Trenching and Connections | $8,000–$25,000 |
| Contingency Allowance | $3,500–$9,000 |
| Total Planning Budget | $35,000–$100,000 |
This amount covers basic site preparation only. Costs for foundations, concrete slabs, permits, paving, landscaping, soil remediation, and major utility connections should be calculated separately.
A professional survey, soil report, and contractor earthwork estimate will provide a more reliable figure for the actual commercial construction project.
Site Preparation Challenges in the San Francisco Bay Area
In the San Francisco Bay Area, site preparation must balance challenging local geology and strict regulations with project goals. Some key barriers include:
- Ground conditions can shift within a short distance, from soft, water-saturated bay deposits and artificial fill near the shoreline to expansive soils, shallow rock, and steep inland terrain.
- Projects near active fault lines or inside mapped seismic hazard zones may require site-specific geotechnical studies because earthquakes can trigger liquefaction or slope movement.
- Hillside properties also demand careful excavation, retaining systems, drainage, and erosion-control planning, especially before winter rains.
- Shallow groundwater across low-lying shoreline zones can complicate deep excavations and subgrade preparation.
- Historic industrial sites near the waterfront may frequently require extensive remediation.
- Bayfront sites often need added protection from rising tides and storm surges.
Since the above conditions (especially near the Bay) can cause settling or sliding on steep urban lots, construction projects begin with geotechnical and seismic investigations and thorough soil testing.
Regulations add another layer of coordination. Permitting specialists secure city approvals (for example, the City of San Francisco requires an Erosion Sediment Control Plan for sites over 5,000 sq ft) and a state stormwater pollution plan if required. On tight urban sites, contractors may need to manage shoring, utility locating, soil hauling, pedestrian protection, deliveries, and limited equipment access simultaneously.
How Contractors Adapt to Local Ground Conditions
For example, a commercial infill project near the Bay may uncover loose fill and a high groundwater table. Rather than compacting the surface and moving ahead, the team may need to remove unsuitable soil, install subdrainage, place engineered fill in tested lifts, and adjust the foundation design. An experienced Bay Area general contractor coordinates the geotechnical engineer, civil engineer, earthwork crews, and inspectors so these issues are resolved before foundation construction begins.
Site Preparation Problems and How to Avoid Them
Even with good planning, site preparation can encounter obstacles. Common issues may include:
- Unexpected Soil Conditions: Soil tests might miss pockets of soft fill, buried debris (old foundations, trash), or high groundwater. Discovering these on-site can slow work. For example, hit unexpected rubble, the crew must stop and remove it.
Mitigation: Allow for contingency in the schedule and budget. If unknowns are likely, do extra borings.
- Weather Delays: Heavy rain can halt earthmoving, making the soil too wet to work or causing erosion of fresh cuts. Flooding can submerge low areas, requiring pumping. High winds can affect crane work or scatter loose debris.
Planning: Monitor forecasts, have erosion controls ready, and possibly tent or cover sensitive areas.
- Inadequate Soil Compaction: A frequent mistake is rushing compaction. If the contractor tries to compact too thick a layer at once, or works when soil is too dry/wet, the density will be insufficient. This leads to settlement later.
Solution: Follow engineering specs closely, perform compaction tests, and accept necessary rework.
- Poor Grading Decisions: Incorrect slopes can create drainage problems. A site that is “flat” isn’t necessarily properly drained. For example, if a finish grade is two inches lower near a foundation, water will pool there every rain. This scenario often necessitates digging up landscape to regrade, which is an expensive fix.
Mitigation: Prevent it by having the surveyor and contractor double-check elevations before finishing.
- Neglecting Erosion Control: Skipping silt fences or re-seeding can lead to muddy runoff and may violate stormwater regulations. This can stop work or incur fines.
Solution: Always install and maintain erosion controls immediately after clearing.
- Poor Communication: Lack of coordination between surveyors, engineers, and contractors is a silent killer. If the excavation crew doesn’t know the updated building pad elevation, or the plumber starts trenching where the engineer hasn’t approved, costly mistakes occur.
Best Practice: Regular coordination meetings and clear documentation prevent this.
These site preparation mistakes can often be traced back to the planning phase. For example, failing to fully interpret the soil report, which might have flagged clay soils prone to heave, leads to surprise expansion issues later. In fact, a study of foundation failures found that many causes were “inadequate geotechnical investigation” and “improper construction sequence”. Vigilance during site prep, which involves frequently checking and testing, is the best defense.
Best Practices for Effective Site Preparation
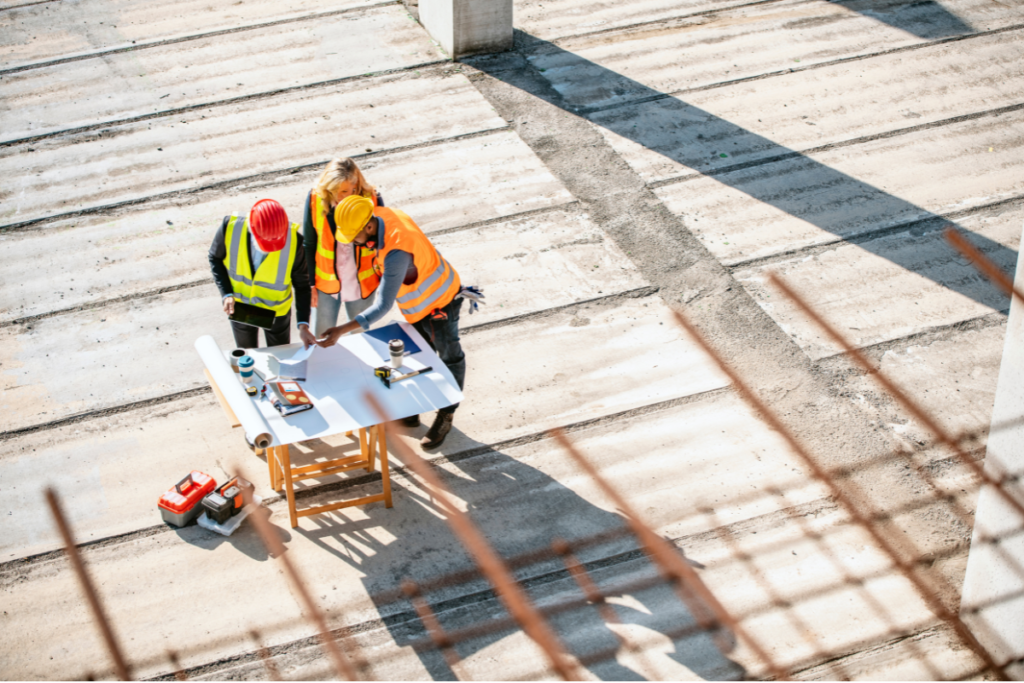
Successful site prep is not defined by how quickly the land is cleared. It is defined by how effectively risks are identified and controlled.
To achieve a smooth site preparation process, construction teams should follow proven best practices:
1. Develop a Thorough Plan
Develop a detailed site preparation plan before breaking ground. This includes clear sequences of tasks, resource lists (equipment, crew), drainage strategy, utility coordination, and contingency plans. For example, if heavy rain is forecast, know which tasks can pause and which must proceed (erosion control is urgent, grading can wait). A well-thought-out plan helps avoid “surprises” in the field.
2. Engage Experts Early
Involve geotechnical engineers, surveyors, and experienced site contractors from the outset. Their early input can catch potential issues. As one industry guide advises, engaging a geotechnical engineer up front is essential for insights on soil conditions. Their recommendations on foundation type and compaction can save time later.
3. Maintain Accurate Communication
Keep communication lines open among all stakeholders (owners, architects, engineers, contractors) throughout the site prep process. Share survey and soil reports with the team and confirm plans before excavation or final compaction begins. Clearly mark plans on site. If the architect changes the building footprint, the grading contractor must know immediately.
4. Limit Unnecessary Disturbance
Clear and grade only the areas needed for each phase of construction. Preserving existing vegetation and limiting exposed soil can reduce erosion, simplify sediment control, and protect sensitive areas.
5. Plan Drainage Before Moving Soil
Drainage requirements should guide the grading strategy from the beginning. Establishing proper slopes, runoff routes, and temporary controls early helps prevent ponding, erosion, damaged subgrades, and expensive corrections later.
6. Use the Right Equipment and Skilled Operators
Match machines to the job. A skilled operator can grade to half-inch accuracy with a motor grader, while an inexperienced one might leave ripples. Similarly, using a small bulldozer where a large one is needed wastes time. Make sure operators are trained and certified for their equipment, and that all machinery is well-maintained.
7. Compact Fill in Controlled Layers
Place fill in specified lifts, adjust its moisture content as needed, compact it with suitable equipment, and test it according to the geotechnical engineer’s recommendations. Placing deep layers without controlled compaction can lead to settlement and foundation problems.
8. Follow Regulatory Requirements
Comply with local codes on erosion control, noise, and hours of operation. Use BMPs to protect streams and neighbors. For example, many areas require a Stormwater Pollution Prevention Plan (SWPPP) if the site is over an acre. Adhering to these rules avoids fines and work stoppages.
9. Quality Control and Testing
Implement quality assurance and control on compaction, grades, and materials. Perform compaction tests at the frequency specified by the engineer. Inspect trenches before backfilling. Keep daily logs of work done, weather, and equipment. Early detection of a problem (e.g. under-compaction) is far cheaper than discovering it months later.
10. Keep Safety First
Ensure all safety protocols (PPE, trench safety, equipment zones) are followed continuously throughout the site preparation. Conduct toolbox talks about site-specific hazards each day. Adequate lighting and signage are also important if work extends into low-light hours. A site hazard assessment should be updated as conditions change (e.g. when a deep trench is open).
11. Practice Environmental Stewardship
Protect trees or sensitive areas that are to remain. Salvage topsoil for later landscaping if possible. Recycle materials (e.g. concrete) instead of landfilling. These practices demonstrate responsible construction and can often save money on materials.
By combining careful planning with flexible, safety-conscious execution, commercial contractors can minimize delays. Effective site preparation not only reduces risks and rework, but also sets up a project for faster, smoother progress when the foundations are ready to pour.
Frequently Asked Questions (FAQs)
How Long Does Site Preparation Take?
It depends heavily on project scope. A small residential lot might take 2–4 weeks of prep work, while a large commercial site can take months. Complex sites, the permitting process, and weather conditions can also extend the timeline before any work starts.
Can Construction Start Before Site Prep Is Finished?
Generally no. Foundations and vertical construction should not begin until site prep is complete. Building on unprepared ground risks severe problems (uneven settling, erosion under the foundation, etc.). All clearing, grading, utility rough-ins, and compaction should be finished and inspected first.
What If Soil Testing Finds Bad Soil?
If tests reveal weak or expansive soil, engineers may specify remedies: often soil stabilization techniques. This could involve excavating and replacing poor soil, mixing in lime or cement to stabilize clays, installing deeper pile or pier foundations to reach bedrock, or designing a floating slab. Such measures add cost, but they are far cheaper than repairing a collapsed foundation later.
Is Site Preparation the Same as Earthwork?
“Earthwork” usually refers to the excavation, filling, and grading portion of site prep. So earthwork is a major component of site preparation, but site prep also includes tasks like clearing, surveying, and utilities that aren’t purely earthmoving.
Is Site Preparation the Same as Grading?
No. Grading is one part of site preparation that shapes the ground to the required elevations and drainage slopes, while site preparation covers the entire process of preparing it for construction.
Who Is Responsible for Site Preparation?
The general contractor typically coordinates site preparation with civil and geotechnical engineers, architects, surveyors, subcontractors, and inspectors.
Conclusion
Investing in thorough site preparation is an investment in the long-term success of the construction. A well-executed site prep phase guarantees that foundations will be solid, drainage will be effective, and the project can proceed on time. Experienced contractors understand that every minute spent planning and preparing the site upfront saves days of trouble down the line. That is why, whether it’s a new office building in San Francisco or a warehouse in Oakland, giving proper attention to site prep is non-negotiable.
By following the steps outlined above and paying attention to factors like soil, slope, and safety, construction teams can lay a rock-solid groundwork for success. Always remember: the quality of a building starts with the quality of the ground beneath it.
Planning a commercial construction project in the San Francisco Bay Area? Contact Constructive Solutions, Inc. for guidance on site preparation and construction planning.
Relevant Resources:
- Grading in Construction: Everything You Need To Know
- What Does a General Contractor Do and Why You Should Hire One
Constructive Solutions, Inc. is a full-service commercial construction company serving San Francisco and Bay Area.
Whatever your vision, we have the resources, experience, and insight to make your concept a reality, and a space where your business can flourish.
Call Us Now for Estimate








Leave a Reply